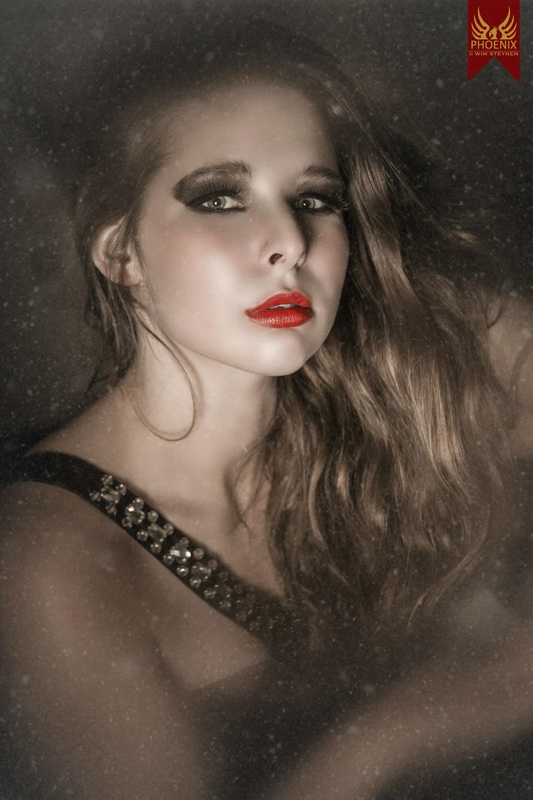
And here it is! So proud
Love, VisaBie *
|
And here it is! So proud Love, VisaBie *
0 Comments
Goodmorning! Cellphone blog today! I would like to talk about lips today. Lately I've been trying to use lipstick daily. Normally I don't like wearing lipstick for different reasons. The main one is: I love kissing my hubs and don't want him to look like ... Well... A guy with make up on. Also I don't like having to re apply it after a while. I know they say to use primer and such, but has anyone ever found a lipstick that is drink and foodproof? So my question to you is: which is your ultimate fave lipstick? Any tips for girls like me who kiss too much, drink too much tea and coffee during the day and don't like to re apply every 5 minutes? Every tip and trick is greatly appreciated! :-) Love, VisaBie * Hi everyone, hope your week is going well! Today I would l like to talk about my daily make up routine. I noticed that some of the girls at work did not really know what steps they should follow for a basic make up look. This post will show you what I do every morning. It might seem long, but if you've been doing it for a while it doesn't take all too long. Let's say about 20 minutes max :-) I'll give the step summary first and then I will explain them in detail. Allrighty, so here we go! Summary
First of all, your face needs to be fresh and make up free. Just do your normal cleansing ritual and you will be fine :-) I love using the Nivea Aqua Effect cleansing wipes. Instant freshness! I am rather sensitive to strong smells and these wipes have a very soft smell. It took me a while to find a good day creme. I'm really picky and eventually I decided Nivea is my brand. I use the aqua effect moisturizer. But recently I have discovered the MAC Oil Control Lotion. Because I was not too sure if I would like it, I got the travel size lotion (30 ML). I will definitely buy more once this is used up. I'm a fan. I hate looking shiny after a while and this lotion really helps with this. It makes sure your skin stays matte. Step 2 - Primer + Concealer I start by using the Benefit Stay don't stray primer for concealers and eyeshadows. The colour I use is Medium/Deep. 3 dots under the eyes and 3 dots on the eyelid and under the eyebrow. This primer makes sure your concealer and your eyeshadow stays put throughout the day. I use the ZOEVA 142 Concealer Buffer brush to blend it out. This brush is DA BOMB. It's too cute and so soft. It's great that it's so soft so it does not hurt the thin skin under your eyes. 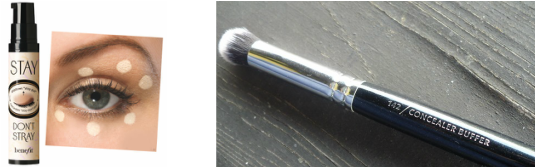
After the primer it's time for concealer. I have rather dark circles under my eyes and no puffiness. To light the circles up I use orange colours. Because my skin is rather dry I should not use concealer sticks. I used to do this in the past but it was no good. So now I use the MAC Prep and Prime Highlighter Bright Forecast. Same story as the Benefit primer: a couple of dots under the eyes and some on the eyelid and blend away with the concealer buffer brush. (In the wintertime I might use a lighter colour as well, Radiant Rose. This is really pink so I need to mix it with the warmer colour. If I don't mix it, the circles under my eyes look a bit grey ) Step 3 - Foundation + Contouring Foundation is the next step. To be honest I don't like using foundation. I don't want to look fake if you know what I mean?! So I use a moisture foundation instead of a normal foundation. It has a SPF 15 factor in it and it feels like a day creme. The one I use is MAC Moisture Foundation NC37. It's a rather warm colour but not too dark. I fell in love with this and I'm going to the MAC store this weekend to get more colours. During make up class the teacher put some foundation on her hand or on a disc and then she dipped the brush in it to put it on the face. I found that I wasted too much foundation with this. I still use this technique for shoots when I'm doing the make up for the girls, but not for myself. How do I use it then? I put some dots all over my face using my finger and blend them out with the ZOEVA 102 Silk Finish brush. I know this brush is probably not the right brush for foundation, but it just feels nice and blends it all so well. (Since I use my fingers a lot for make up, I wash my hands almost after every step). Don't be worried if you think your face is shiny after using this. We will use compact powder to matify it all. 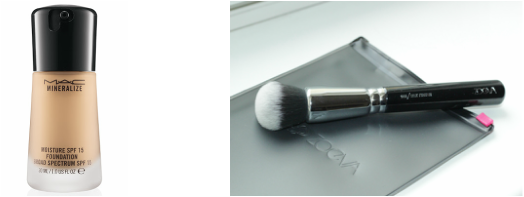
After using the foundation it's time for some contouring. I use a foundation for this, but you can use a contouring pallette as well. Parisax Fond De Teint Caramel is the colour I use. I only contour under my cheekbones and not on my forehead. How do you know where to contour? Make a duck face! You will feel your cheeckbones and right underneath it you should make a line. Do it from your ear to your lips but don't go too far towards the lips. Never use too much. You can always add more, but taking colour away means you have done lot's of work for nothing :-) So I use my finger or concealer brush to make the line. It has to be a bit wider on the side of your face. This needs to be blended with the rest of your foundation. I use the ZOEVA 124 Grand Stippling brush. Again, probably not the right brush to use, but it works for me! Step 4 - Powder + Highlight To matify all of the above one must use powder! I use the Parisax Powder Brush 2. It's nice and fluffy. You may have noticed the brand names I'm using and they are rather expensive. But there are also cheaper brands that are really good. The 2 brands I really like are Catrice and Essence. Cheap and Good! The first powder I use to make my face look matte is the Catrice Multi Colour Compact Powder lighter skin. In class we used a complete white compact powder, but this has a bit of a colour in it so you don't look like Morticia Adams. If you like to have a more bronzed effect, like me, you can use some more powder, the Catrice Sun Glow Matt Bronzing Powder. I can not live without my bronzing powder. I use the medium skin colour for my entire face and then I contour some more with the dark skin colour. For contouring I use the Parisax Blush Brush 4. I go over the same line as the foundation contouring line. 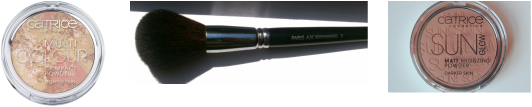
Have I mentioned I love a bronzed skin? I LOVE A BRONZED SKIN!! I hate it when it's winter time and my awesome tan is gone :-( To make sure my skin is bronzed enough, I use Too Faced Snow Bunny luminous bronzer or The Balm Betty Lou Manizer. The snow bunny is a bit less dark and intense. Just use a little amount of the bronzer on the top of your cheekbones. You can use a blush brush for this as well. Sometimes I like using blush, sometimes I don't. It depends on the mood. I like the 'cheap' brands like Catrice and Essence. To put it on, just smile so your cheeks puff up and you know where to dab the blush. Don't overdue it! You do not want to look like a clown. To know how to apply (depends on your face type) look for some online video tutorials. And last but not least: highlighting powder for that extra *umphf*! Farmasi Star Highlighting Powder is the one for me. I apply it with the ZOEVA 105 Luxe Highlight brush. Don't overdo the highlighter! You don't want to glow in the dark. Just dap a little bit right next to your eye and a bit underneath it. It's hard to explain, but you find lots of tutorials online if you need help. If you have a lighter skin you can use the Too Faced Candlelight highlighting powder duo. I have this as well but find a bit too light. Maybe I can use it in the winter time... 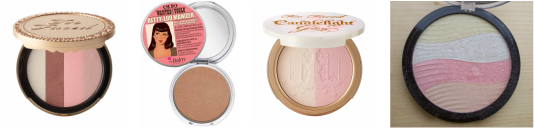
Step 5 - Eyes I never ever ever ever leave the house without mascara! This is my 1 item I ALWAYS need. It just makes your eyes pop and gives you that awake look. Remember we used a primer in the beginning on our eyelids? I have noticed if I don't use eyeshadow, you might be able to see some lines aftera couple of hours. No good! So, use eyeshadow. There is this 1 pallette I really like, the W7 In the Nude pallette. It's about the same as the Naked pallettes from Urban Decay. It contains 12 eyeshadows and the price is good. I use Venice over my complete eyelid using the ZOEVA 234 Luxe Smokey Shader. Make sure to cover the complete eyelid. Then I use a different colour in the crease, Alice or Coffee Cup. The brush for this is ZOEVA 231 Luxe Petit Crease. I always use a shade darker than the shade on my eyelid. With 1 shade even more dark than the crease, for example Fashionista, I blend a bit on the outside corners of my eyes. You can use the same shader brush you used before. Or a nice brush for blending eyeshadows is the MAC 217 Blend brush. Finally I end with highlighting under the brow line with a nice light and sparkly colour like Angel. (If you don't have brushes you can always use the fingers for eyeshadow). Another nice pallette for daily use is the MAC Cool Neutral pallette. 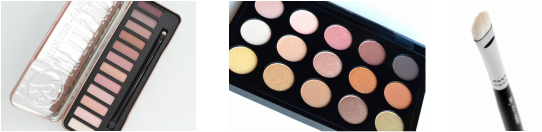
Like mascara, I rarely go outside without eyeliner. It does not need to be the liquid or creme kind. Any kind of eyeliner will do. If I don't use eyeshadow because I don't have the time, I use compact eyeliner. I mix black with a colour. The black is the Parisax Eye Liner Compact Black. I usually mix this together with Too Faced Dirt Bag eyeshadow. There are 2 brushes I really enjoy using for eyeliner: MAC 263 and the ZOEVA 317 Wing Liner. They both make a very nice winged liner. Once you know how to use it, you'll never want to use anything else. If I do have eyeshadow on I use an eyeliner pen. If I want a really thin line I use the Essence Super Fine eyeliner pen. You can come really close to the lash line and you can make a very nice wing with this. If I'd rather have a thicker line, I use the Benefit They're Real push-up liner. This has more of a pencil feel and it's not real easy to make a thin line with this. It does stay on for hours and hours and hours. Nice and intens black as well. I almost always use a black colour. I always use a black pencil to colour in my top waterline so you don't see the 'space' between the eyeliner and the lashes in case you did not come close enough to the lashes. We finish it off with MASCARA BABY!!!*yay*. I have the luxury of having long lashes, so I don't need to use a curler or fake lashes. Thank you Mom and Dad. Good genes. It might seem weird, but I use 3 different mascaras and layers. I start with Too Faced Size Queen Mascara. Layer 1: awesomeness. 2nd one I use is the Urban Decay Supercurl curling Mascara. The brush is completely different, it makes sure it 'grabs' all of the lashes, 1 by 1. And last I use Benefit They're real mascara. It makes it extra black, extra long and makes sure it gives me extra volume. Don't be afraid to put mascara on the lower lashes as well, but don't do 3 layers. 1 is plenty :-) 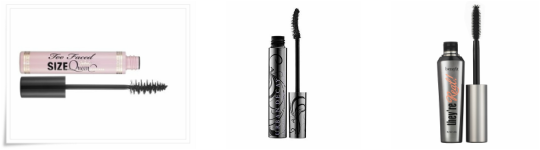
Step 6 - Lips
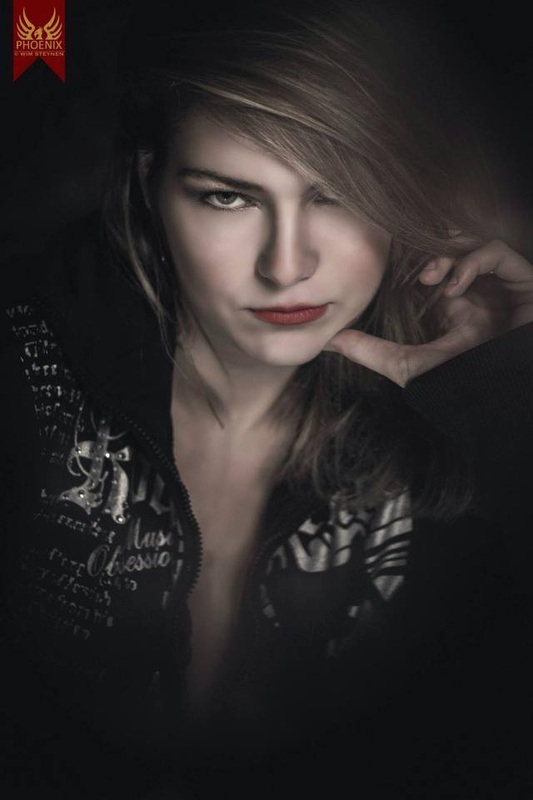
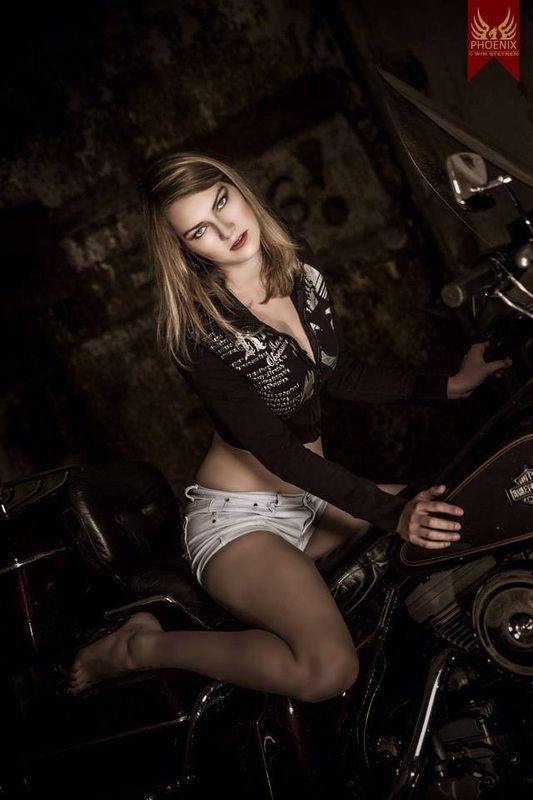
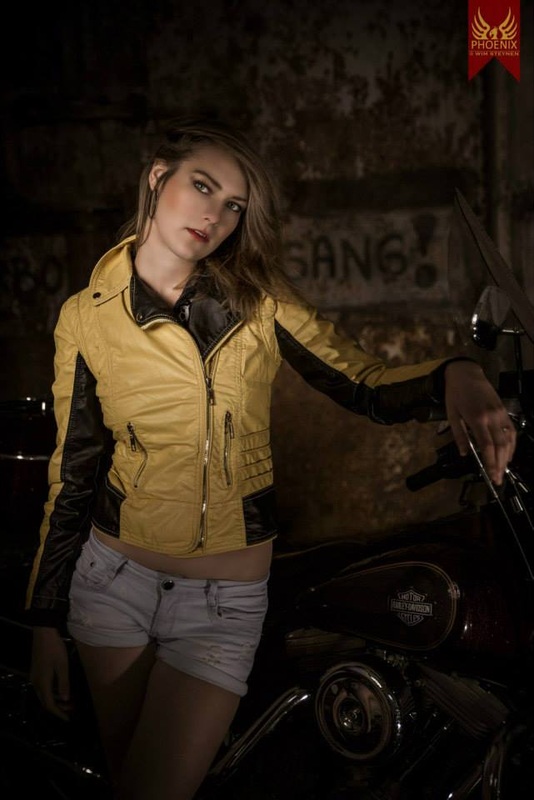
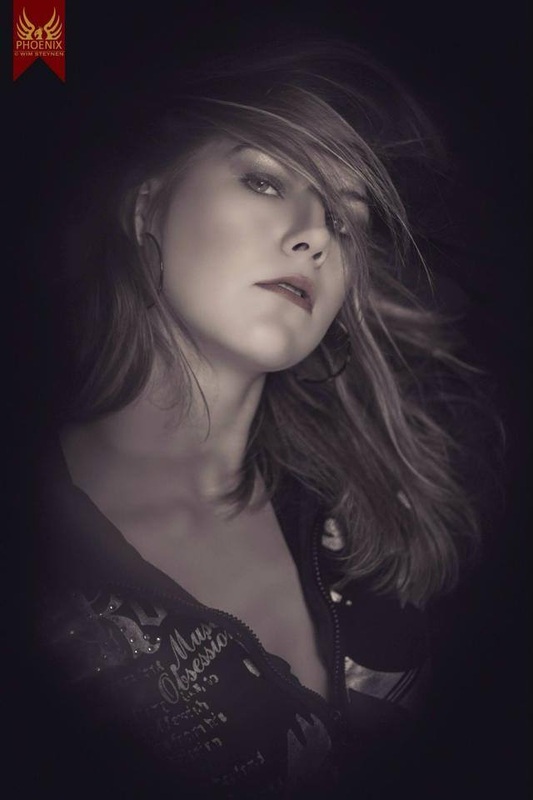
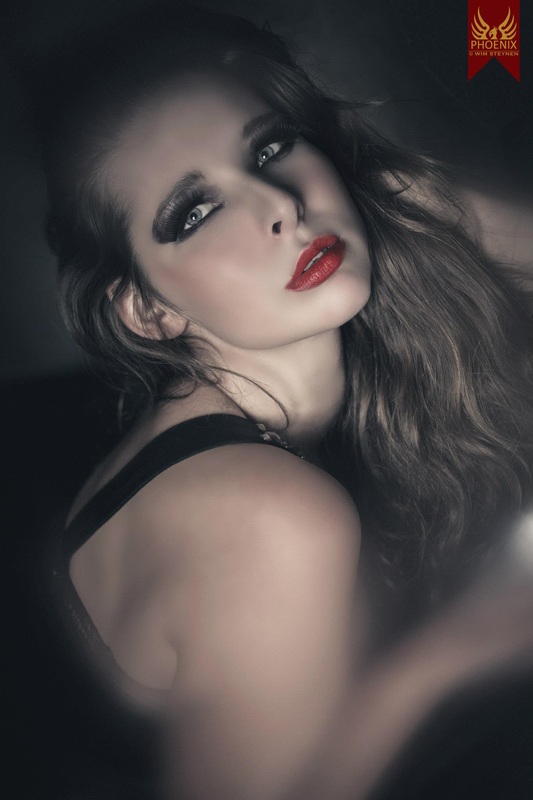
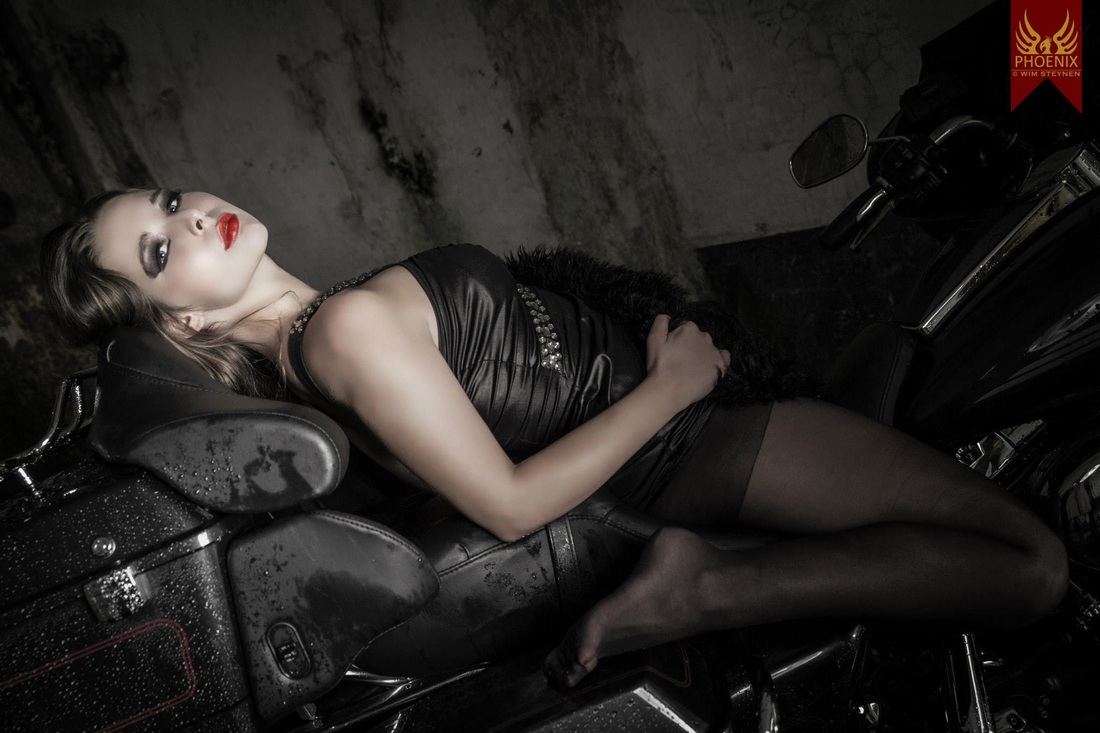
A key to nice lips: primer! I use the MAC Lip primer. Make sure you let it dry a bit before putting on the lipstick. I never use a lip pencil for my daily look. If I want a more darker colour I do use a pencil. Nice colours for the daytime are nude colours, light pink or even a light brown. (At least for me) I noticed that nude matte colours are not my friends. You can see every little flaw on my lips. Since I have very dry lips, I have lots of flaws ;-) MAC has some nice colours. The first layer I use is the MAC Pro Longwear Lipcreme Soft Shell and followed by a top layer of MAC Viva Glam Lustre. I drink lots of tea and the colours stay on my lips until lunchtime. Not too bad! --------------------------------------------------------------------------------------------- So girls, this is my routine. It works for me. You just need to find what you want to use every day and how you want to apply it. There is no right or wrong way to do it. Try to find the right colours for your skin tone. That's the hardest part. Good luck! Love, VisaBie * Links of the products I use: http://www.maccosmetics.be/ https://www.zoeva-shop.de/de/ http://www.benefitcosmetics.com/ http://www.urbandecay.com/ http://www.essence.eu/essenceworld/index.php http://www.catrice.eu/nl/home.html  Hi Beauty Lovers! Today I would like to share some new pictures from the Harley Davidson Calendar shoot. This was my 2nd model, Anke. I tried to give her a more subtle smokey eye look using the 'In The Buff Palette' from W7 Cosmetics which I absolutely love love love :-) Hope you like the pictures. Love, VisaBie * 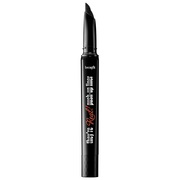 Hi beauty lovers! Today I'm writing a review about this new eyeliner I bought, the Benefit eyeliner. To be honest, I had not heard from this brand before (I feel like I've been living under a rock) but one day I was watching a make up tutorial by the always funny and gorgeous Mrs Jessie James Decker, where she was using this eyeliner. I thought it looked so cool and easy. I'm always up for trying new eyeliners, too make my life and makeup ritual easier ;-) The first problem was, where do I find this brand? It's not for sale in Belgium... Luckily we were going to London for a day and there I was, walking in John Lewis, and voila: Benefit! I went straight for the eyeliner when a lovely lady asked me if I wanted to try it. I thought: 'Helloooo free make over' (sorry it took about half an hour Husband... Thanks for waiting babe) The fun part about this eyeliner is you have to twist the bottom to make the gel come out. Super easy and this way your eyeliner does not dry out, which is always a plus. You have to squeeze the top part a bit to make sure there is enough gel for your liner. You do have to make sure you don't twist too much, it comes out really fast and easy! And you don't want your line to be super thick. I have a feeling this eyeliner is a mix between a gel and a pencil. If you like your line to be super thin and close to your lashes, you will be dissapointed with this one. If you like the old glam, roaring 20's look, this is the eyeliner for you. They show it on the package as well, a nice thick eyeliner with a nice wing. I must say, very easy to make a flawless wing with this eyeliner!! And admit it girls, we all love a perfect winged eyeliner. I'm not trading my all favorite eyeliner in for this one (Essence fine eyeliner, you are my number one forever!) but I must admit I really really really like using this Benefit eyeliner as well :-) Love, VisaBie * 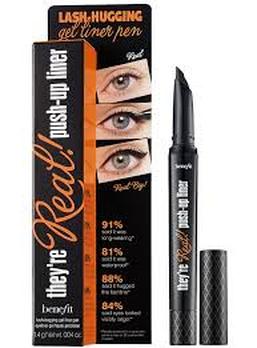 About 2 weeks ago I had to pleasure to participate in an awesomely cool photoshoot. It was for the Harley Davidson Essen club. They decided they would like to do a calendar. Half naked girls on Harley's? Don't have to ask me twice. |
Archives
December 2018
Categories |


 RSS Feed
